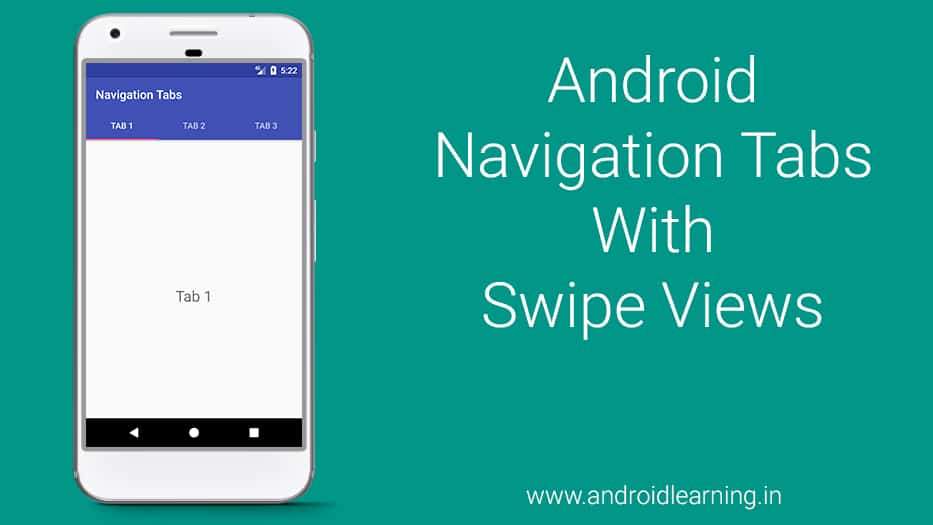
Swipe views provide lateral navigation between sibling screens such as tabs with a horizontal finger gesture (a pattern sometimes known as horizontal paging). This lesson teaches you how to create a tab layout with swipe views for switching between tabs (Navigation Tabs), or how to show a title strip instead of tabs.
Swipe View Design
Before implementing these features, you should understand the concepts and recommendations as described in Designing Effective Navigation and the Swipe Views design guide
In this tutorial, we would make a screen with three tabs using these new APIs for tabs with Fragment and a ViewPager which would look like the Video:
Creating Android Project
- In Android Studio, create a new project from File ⇒ New Project and fill all the required details.
more details go to Create New Android Project. - Add these libraries in the dependencies section of your build.gradle file:
dependencies { compile fileTree(dir: 'libs', include: ['*.jar']) ... compile 'com.android.support:appcompat-v7:25.3.1' compile 'com.android.support:design:25.3.1' ... } - Open main activity layout file and add Toolbar, TabLayout and ViewPager element.
Toolbar:<android.support.v7.widget.Toolbar android:id="@+id/toolbar" android:layout_width="match_parent" android:layout_height="?attr/actionBarSize" android:background="?attr/colorPrimary" app:layout_scrollFlags="scroll|enterAlways" app:popupTheme="@style/AppTheme.PopupOverlay" />TabLayout:
<android.support.design.widget.TabLayout
    android:id="@+id/tabs"
    android:layout_width="match_parent"
    android:layout_height="wrap_content" />
ViewPager:
<android.support.v4.view.ViewPager android:id="@+id/view_pager" android:layout_width="match_parent" android:layout_height="match_parent" app:layout_behavior="@string/appbar_scrolling_view_behavior" /> - Create a FragmentPagerAdapter class to provide views to tab fragments. Create a class called MyAdapter.java.This adapter provides fragment views to tabs which we are going to create them later in this tutorial.
private class MyAdapter extends FragmentPagerAdapter { MyAdapter(FragmentManager fm) { super(fm); } /** * Return fragment with respect to Position . */ @Override public Fragment getItem(int position) { switch (position){ case 0 : return new OneFragment(); case 1 : return new TwoFragment(); case 2 : return new ThreeFragment(); } return null; } @Override public int getCount() { return int_items; } /** * This method returns the title of the tab according to the position. */ @Override public CharSequence getPageTitle(int position) { switch (position){ case 0 : return "Tab 1"; case 1 : return "Tab 2"; case 2 : return "Tab 3"; } return null; } } - Add below code to add Toolbar, TabLayout, and ViewPager in MainActivity class.
Toolbar toolbar = (Toolbar) findViewById(R.id.toolbar); setSupportActionBar(toolbar); viewPager = (ViewPager) findViewById(R.id.view_pager); tabLayout = (TabLayout) findViewById(R.id.tabs); viewPager.setAdapter(new MyAdapter(getSupportFragmentManager())); tabLayout.post(new Runnable() { @Override public void run() { tabLayout.setupWithViewPager(viewPager); } }); - Next, to display Android tabs with fragment and ViewPager, let’s define three simple fragments and their layouts:
Create a new layout file under src ⇒ res ⇒ layout folder named fragment_one.xml and paste the following code.<RelativeLayout xmlns:android="http://schemas.android.com/apk/res/android" android:layout_width="match_parent" android:layout_height="match_parent" android:paddingBottom="@dimen/activity_vertical_margin" android:paddingLeft="@dimen/activity_horizontal_margin" android:paddingRight="@dimen/activity_horizontal_margin" android:paddingTop="@dimen/activity_vertical_margin"> <TextView android:id="@+id/section_label" android:layout_width="wrap_content" android:layout_height="wrap_content" android:layout_centerInParent="true" android:textSize="25sp" android:text="Tab 1" /> </RelativeLayout>Also, create a new class named FragmentOne.java under your main package.
package org.snowcorp.sample.navigationtabs;
import android.os.Bundle;
import android.support.v4.app.Fragment;
import android.view.LayoutInflater;
import android.view.View;
import android.view.ViewGroup;
/**
 * Created by Akshay Raj on 17-04-2017.
 * [email protected]
 * www.snowcorp.org
 */
public class FragmentOne extends Fragment {
    public FragmentOne() {
        // Required empty public constructor
    }
    @Override
    public View onCreateView(LayoutInflater inflater, ViewGroup container,
                             Bundle savedInstanceState) {
        return inflater.inflate(R.layout.fragment_one, container, false);
    }
}
Now create another Layout and Class file for other Tabs. Run the project and check the views for tabs.

Complete Code
Below is the complete code for MainActivity.java class
package org.snowcorp.sample.navigationtabs;
import android.os.Bundle;
import android.support.design.widget.TabLayout;
import android.support.v4.app.Fragment;
import android.support.v4.app.FragmentManager;
import android.support.v4.app.FragmentPagerAdapter;
import android.support.v4.view.ViewPager;
import android.support.v7.app.AppCompatActivity;
import android.support.v7.widget.Toolbar;
public class MainActivity extends AppCompatActivity {
    private TabLayout tabLayout;
    private ViewPager viewPager;
    public static int int_items = 3 ;
    @Override
    protected void onCreate(Bundle savedInstanceState) {
        super.onCreate(savedInstanceState);
        setContentView(R.layout.activity_main);
        Toolbar toolbar = (Toolbar) findViewById(R.id.toolbar);
        setSupportActionBar(toolbar);
        viewPager = (ViewPager) findViewById(R.id.view_pager);
        tabLayout = (TabLayout) findViewById(R.id.tabs);
        viewPager.setAdapter(new MyAdapter(getSupportFragmentManager()));
        tabLayout.post(new Runnable() {
            @Override
            public void run() {
                tabLayout.setupWithViewPager(viewPager);
            }
        });
    }
    private class MyAdapter extends FragmentPagerAdapter {
        MyAdapter(FragmentManager fm) {
            super(fm);
        }
        /**
         * Return fragment with respect to Position .
         */
        @Override
        public Fragment getItem(int position)
        {
            switch (position){
                case 0 : return new FragmentOne();
                case 1 : return new FragmentTwo();
                case 2 : return new FragmentThree();
            }
            return null;
        }
        @Override
        public int getCount() {
            return int_items;
        }
        /**
         * This method returns the title of the tab according to the position.
         */
        @Override
        public CharSequence getPageTitle(int position) {
            switch (position){
                case 0 :
                    return "Tab 1";
                case 1 :
                    return "Tab 2";
                case 2 :
                    return "Tab 3";
            }
            return null;
        }
    }
}
Download Source Code
[et_bloom_locked optin_id=”optin_3″] Download Source Code [/et_bloom_locked]


I really enjoyed the tutorial!
I’ll use it on my next project.
Thank you.