AdMob by Google is an easy way to monetize mobile apps with targeted, in-app advertising.
AdMob by Google is a mobile advertising platform that you can use to generate revenue from your app. Using AdMob with Firebase Analytics provides you with additional app usage data and analytics capabilities. Firebase integrates with AdMob without requiring changes to your existing AdMob configuration.
This guide shows you how to integrate the Google Mobile Ads SDK into a brand new app and use it to display an AdMob banner ad. It takes about thirty minutes to complete and gives you a good sense of how the SDK functions within an app. If you're new to Google Mobile Ads, this is a great place to start before moving on to more advanced examples.
The ad unit and samples that we provide return test ads. Test ads are always available, even if your account is suspended or disabled. For more information, review the AdMob policies and learn more about invalid activity.
It is against AdMob policy to click on your own live ads. During development and testing, use only test ads. If you do need to render live ads before launch, avoid clicking on them. If you click on live ads, your AdMob account may be suspended.
 Congratulations! You've successfully integrated banner ads into an app.
Prerequisites
- Running Android Studio 1.0 or higher
- Developing for Android level 9 or higher
- An Android Studio project If you haven't used Android Studio before, consider running through the Building Your First App tutorial for Android Studio before starting this one.
Integrate Firebase and the Mobile Ads SDK
To get started, see the Add Firebase to Your Android Project guide. If you already have an AdMob account, you can register and link your app with Firebase from within the AdMob console.Verify app-level build.gradle (excerpt)
...
    dependencies {
            compile fileTree(dir: 'libs', include: ['*.jar'])
            compile 'com.android.support:appcompat-v7:xx.x.x'
            compile 'com.google.firebase:firebase-ads:10.0.1'
        }
...
apply plugin: 'com.google.gms.google-services'build.gradle, add them. Place the compile statement inside the dependencies section and the apply plugin statement at the bottom.
- If you see a warning message across the top of the Android Studio window indicating that Gradle needs to perform a sync, click Sync Now. Gradle refreshes your project's libraries to include the dependency you just added.
- If you see a message asking you to install the Google Repository, just agree to the install and have Android Studio take care of the download for you. The Google Repository contains code for Gradle to incorporate.
- Once your build.gradle files are modified and everything has synced, try rebuilding your project (Run app in the Runmenu) to make sure it compiles correctly.
ca-app-pub-XXXXXXXXXXXXXXXX/NNNNNNNNNN.
For your new app to display an ad, it needs to include an ad unit ID. Open your app's string resource file, which is found at BannerExample/app/src/main/res/values/strings.xml.
strings.xml
<?xml version="1.0" encoding="utf-8"?>
<resources>
    <string name="app_name">My Application</string>
    ...
    <string name="banner_ad_unit_id">ca-app-pub-3940256099942544/6300978111</string>
    ...
</resources><string> tag as shown. Note that the ad unit ID provided above is just for testing. It allows you to retrieve a sample banner ad and make sure your implementation is correct. You should always use test ads when developing and testing your app. It is against AdMob policy to click on your own live ads. During development and testing, use only test ads. If you do need to render live ads before launch, avoid clicking on them. If you click on live ads, your AdMob account may be suspended. See the Test ads section of the Targeting guide for information on how to get test ads with your own ad unit IDs.
Place an AdView in your main activity layout
Layout files contain XML definitions for the visual design of things like activities, fragments, and list items. Modify the layout file for the main activity so that it includes an AdView at the bottom. You can add things to an activity programmatically via Java code, but layout files offer better separation of presentation and behavior.
AdView:
- Open the BannerExample/app/src/main/res/layout/activity_main.xml file:
<RelativeLayout xmlns:android="http://schemas.android.com/apk/res/android" xmlns:tools="http://schemas.android.com/tools" xmlns:ads="http://schemas.android.com/apk/res-auto" ... tools:context=".MainActivity"> ... <com.google.android.gms.ads.AdView android:id="@+id/adView" android:layout_width="wrap_content" android:layout_height="wrap_content" android:layout_centerHorizontal="true" android:layout_alignParentBottom="true" ads:adSize="BANNER" ads:adUnitId="@string/banner_ad_unit_id"> </com.google.android.gms.ads.AdView> </RelativeLayout> - Add an additional namespace to be used for ads:
http://schemas.android.com/apk/res-auto - Add a new element for your
AdView. - Set
layout_widthandlayout_heighttowrap_content. - In the
AdViewtag, set theadSizetoBANNERand theadUnitIdto@string/banner_ad_unit_id.
If you look at the last parameter in the AdView tag, you can see that it's called adUnitId. This is the ad unit ID that the AdView uses when requesting ads. In this case, we've given it a reference to the string resource you added in the last step, so the AdView uses that value.
Initialize the Google Mobile Ads SDK
To initialize the Google Mobile Ads SDK at app launch, callMobileAds.initialize() in the onCreate() method of the MainActivity class.
Open your MainActivity.java file. It's in the BannerExample/app/src/main/java/ folder, though the exact subdirectory path varies based on the domain you used when creating your project above. Once it's open in the editor, look for the onCreate() method in the MainActivity class:
MainActivity.java (excerpt)
package ...
import ...
import ...
public class MainActivity extends ActionBarActivity {
    ...
    protected void onCreate(Bundle savedInstanceState) {
        super.onCreate(savedInstanceState);
        setContentView(R.layout.activity_main);
        MobileAds.initialize(getApplicationContext(), "ca-app-pub-3940256099942544~3347511713");
    }
    ...
}Application context or Activity context, and an app ID. App IDs are unique identifiers given to mobile apps when they're registered in the AdMob console.
To find your app ID, click the App management option under the settings dropdown (located in the upper right-hand corner) on the AdMob account page. App IDs have the form ca-app-pub-XXXXXXXXXXXXXXXX~NNNNNNNNNN.
Load the ad in the MainActivity class
The last change needed is for you to add to your app's main activity class some Java code that loads an ad into theAdView, as follows.
MainActivity.java (excerpt)
package ...
import ...
import ...
import com.google.android.gms.ads.AdRequest;
import com.google.android.gms.ads.AdView;
public class MainActivity extends ActionBarActivity {
    ...
    protected void onCreate(Bundle savedInstanceState) {
        super.onCreate(savedInstanceState);
        setContentView(R.layout.activity_main);
        MobileAds.initialize(getApplicationContext(), "ca-app-pub-3940256099942544~3347511713");
        AdView mAdView = (AdView) findViewById(R.id.adView);
        AdRequest adRequest = new AdRequest.Builder().build();
        mAdView.loadAd(adRequest);
    }
    ...
}- Import the
AdRequestandAdViewclasses. - Find your
AdViewin the layout, create anAdRequest, and then load an ad into theAdViewwith it.
Do not use the AdRequest line shown above if you are testing. See the Test ads section of the Targeting guide to learn more about using test devices and test device IDs.
AdView in your app's main activity.
Enjoy a freshly loaded ad
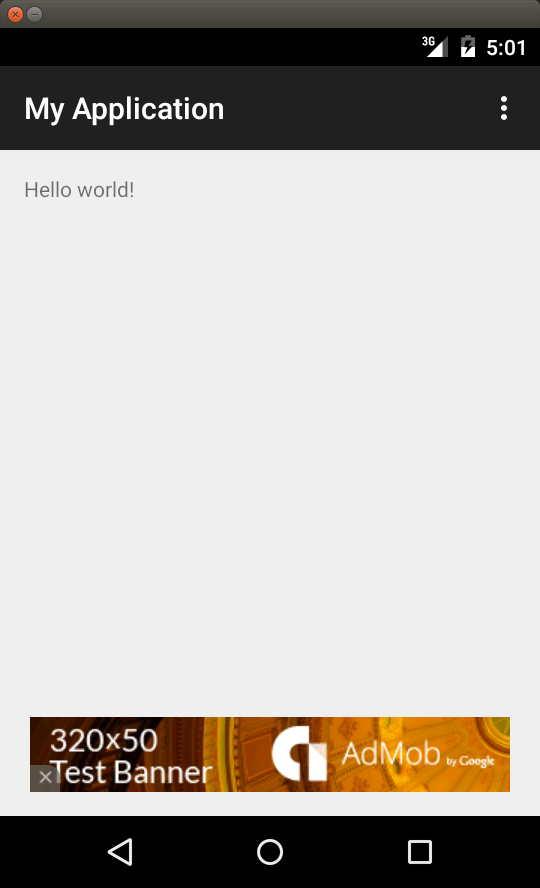
Your app is now ready to display an ad using the Google Mobile Ads SDK. Run it again and see a test banner displayed at the bottom of the device screen: Congratulations! You've successfully integrated banner ads into an app.
